My First Ever Blog
April 20, 2026 · Personal
Today I write my first blog. I have always thought about writing my own blog on my own website but never finished creating blog section on any of the websites I have created before.
Today I write my first blog. I have always thought about writing my own blog on my own website but never finished creating blog section on any of the websites I have created before. This time I made sure to implement it, found a basic HTML5 template, and of-course used Claude. Well in this blog I will show you how I setup this website, and hosted it for free.
Portfolio is always something that CS bros, artists, marketers, data scientists, freelancers have wanted to create. They either end up paying someone (a freelancer) for the same, or create it and keep it for their use, not out of their laptop (sitting in old archives, lol). Today I will share you how I implemented this entire system for free using online templates + AI (Claude in this case).
Tools Used
- HTML5 templates - Bored from all the fancy UI portfolios, I wanted something very minimal, easy to read and build. There are various templates on this website that one can download for free and use. Inspired by Andrej Karpathy's portfolio, I chose the HTML5 Editorial Template.
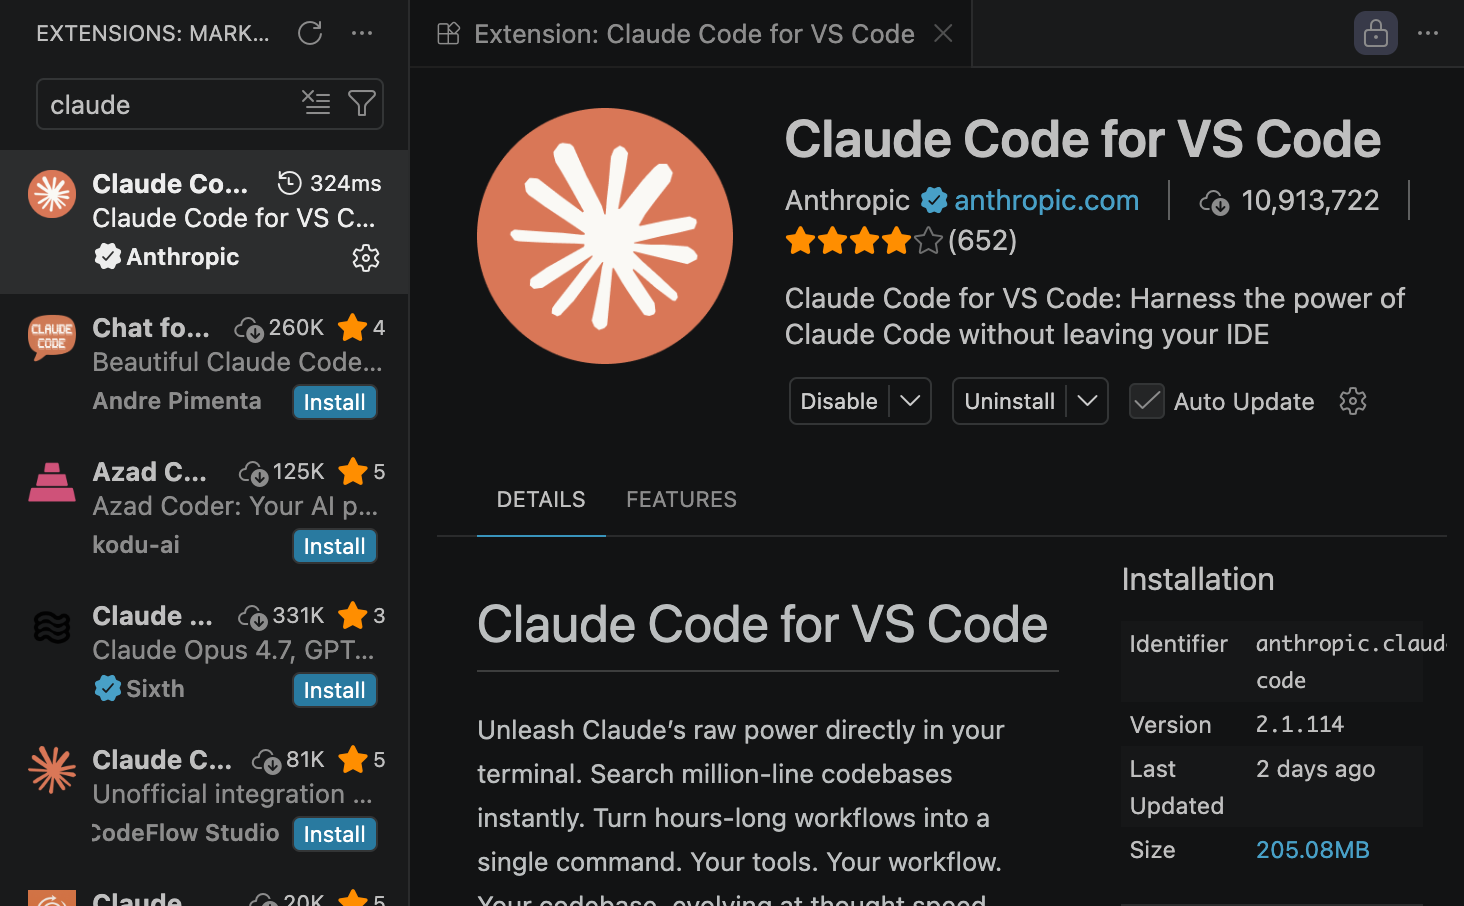
- Claude Code by Anthropic - Just install the original Claude Code extension by Anthropic on VS Code and login to your account. You are good to go (seriously)!!
- GitHub - Mainly for version controlling and ensuring that Claude can access to the versions to revert changes smoothly as and when needed. Plus this will be helpful when hosting as well.
- Cloudflare - This will help you to host your website for free. You can buy a domain of your own and connect custom domain to this free hosting as well. For now, Cloudflare will give you a
project_name.pages.devfor free.
That's it and you're all set!
Step 1: Download Your Template
Head on to HTML5 templates to download the template of your choice. You can even go on any other template provider if you want a more complicated, fancier, and complex portfolio.
When you download it, open it in VS Code, and connect it to a repository on your GitHub account. In my case, I wanted a private repo, so created one of my own and connected the downloaded template to the private repo.
If you need any help in doing this, ChatGPT can be of great help! One thing ChatGPT is great at is providing you outputs and steps to fulfill a task. Just ask it to give you steps to initiate a local git repo and connect it to private repo on GitHub.
Step 2: Customize Your Portfolio
Download the Claude extension on VS Code (as shown in image below).
Ask Claude to first review all files and ensure that it understands the template architecture. Once it does that, ask it to plan, orchestrate and architect the portfolio with any changes of your liking. Once that happens, always ask it to first plan, orchestrate and architect a big change, and then only ask it to modify the code.
Make sure to chunk down big changes to small tasks and ask it to conduct small tasks at a time. This way you can even use smaller models like Sonnet-4.6 instead of using Opus-4.6/4.7.
Step 3: Test Your Portfolio
Always test your website locally using localhost. If it is built using React, NextJs, Angular, etc. then build it and test it. If it is simpler (like mine), then just open the index.html file on your local browser and you can see your Portfolio live.
Ask Claude to fix any changes if and when needed. When the website is working well on localhost, only then move onto hosting it.
Step 4: Host Your Portfolio
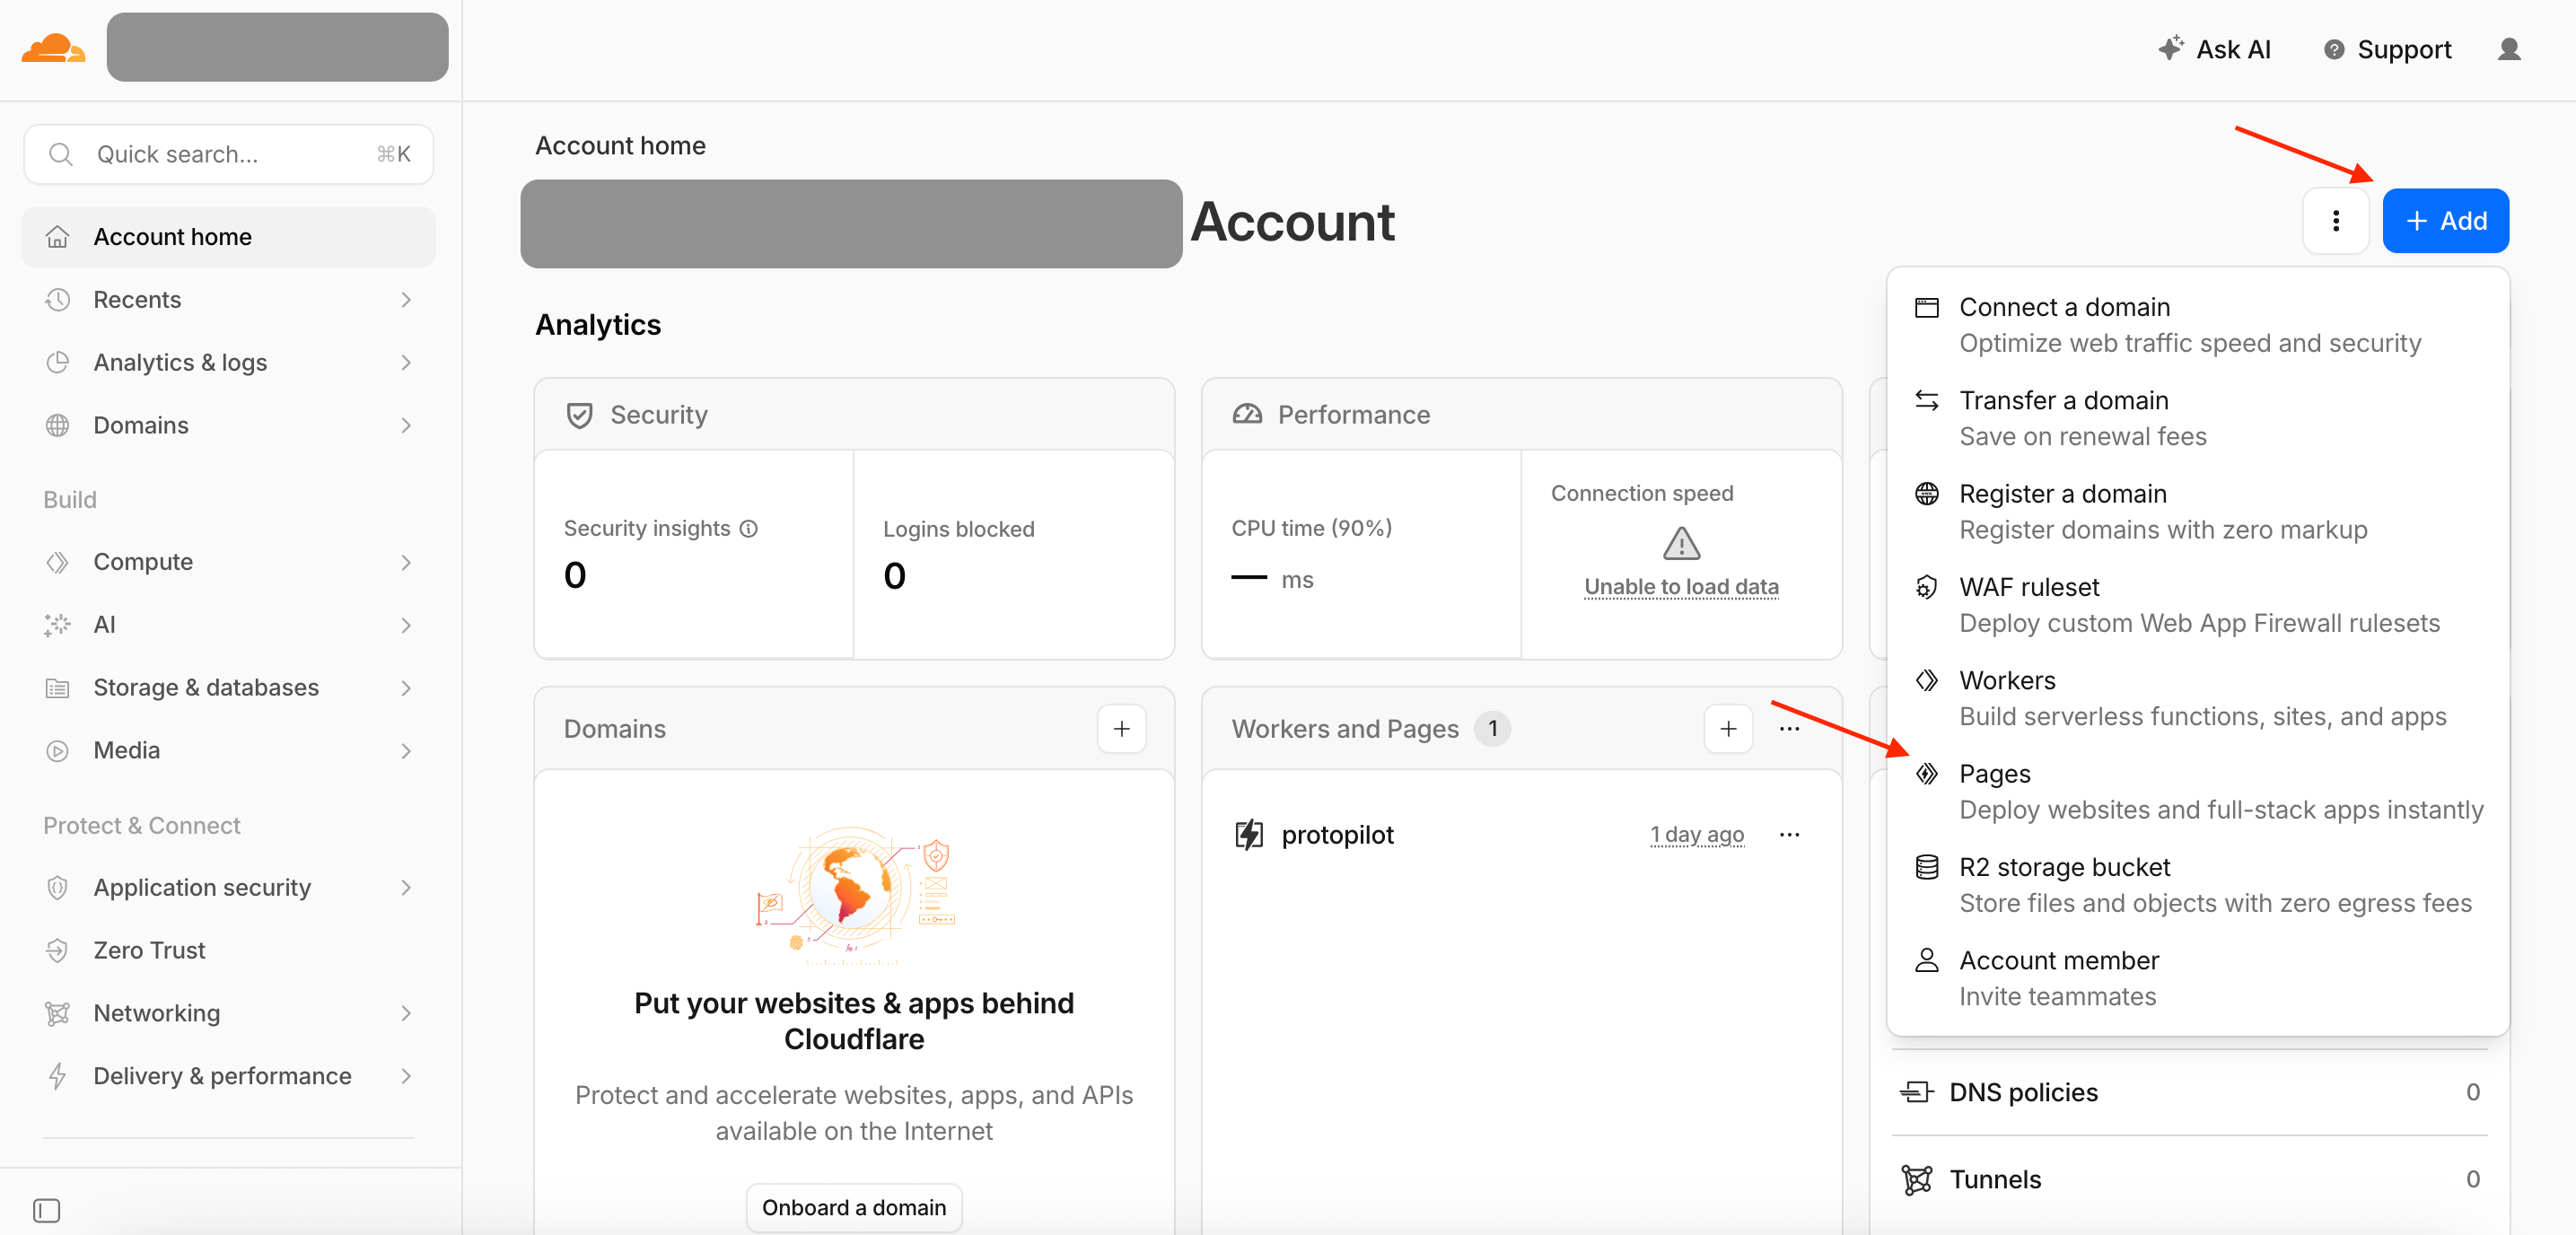
First thing, setup your free account on Cloudflare. Then go to Add button and then select Pages (as shown in image below).
Second, import your GitHub private repo by connecting to your GitHub account. If you do not have a framework like React, Angular, NextJs; then you can go ahead and save in the next step. Else select your framework accordingly. Again, ChatGPT can rescue you here and you can setup your Cloudflare pages accordingly.
The name of your project becomes your the domain name in the following way: project_name.pages.dev.
And there you go, voila! Your portfolio is now live! Now every time you make any changes to your project, git add, commit, and push those changes to the main branch of your GitHub repo, the changes will build automatically to your portfolio.
Email or contact me if you have any questions, and I would be happy to reply!
Quick Update:
While writing this blog, I was thinking how would I redundantly create a blog everytime or ask Claude to do it for me from basic text. Instead I asked Claude to think of a pipeline for me. Best way, create a template for blogs, and use python to build the blog whenever I write a new blog. And that's how it is done. I just write a markdown file for the blog, and then build HTML blog file using python. And its done!